Converting WAV files for the SP404 MK2

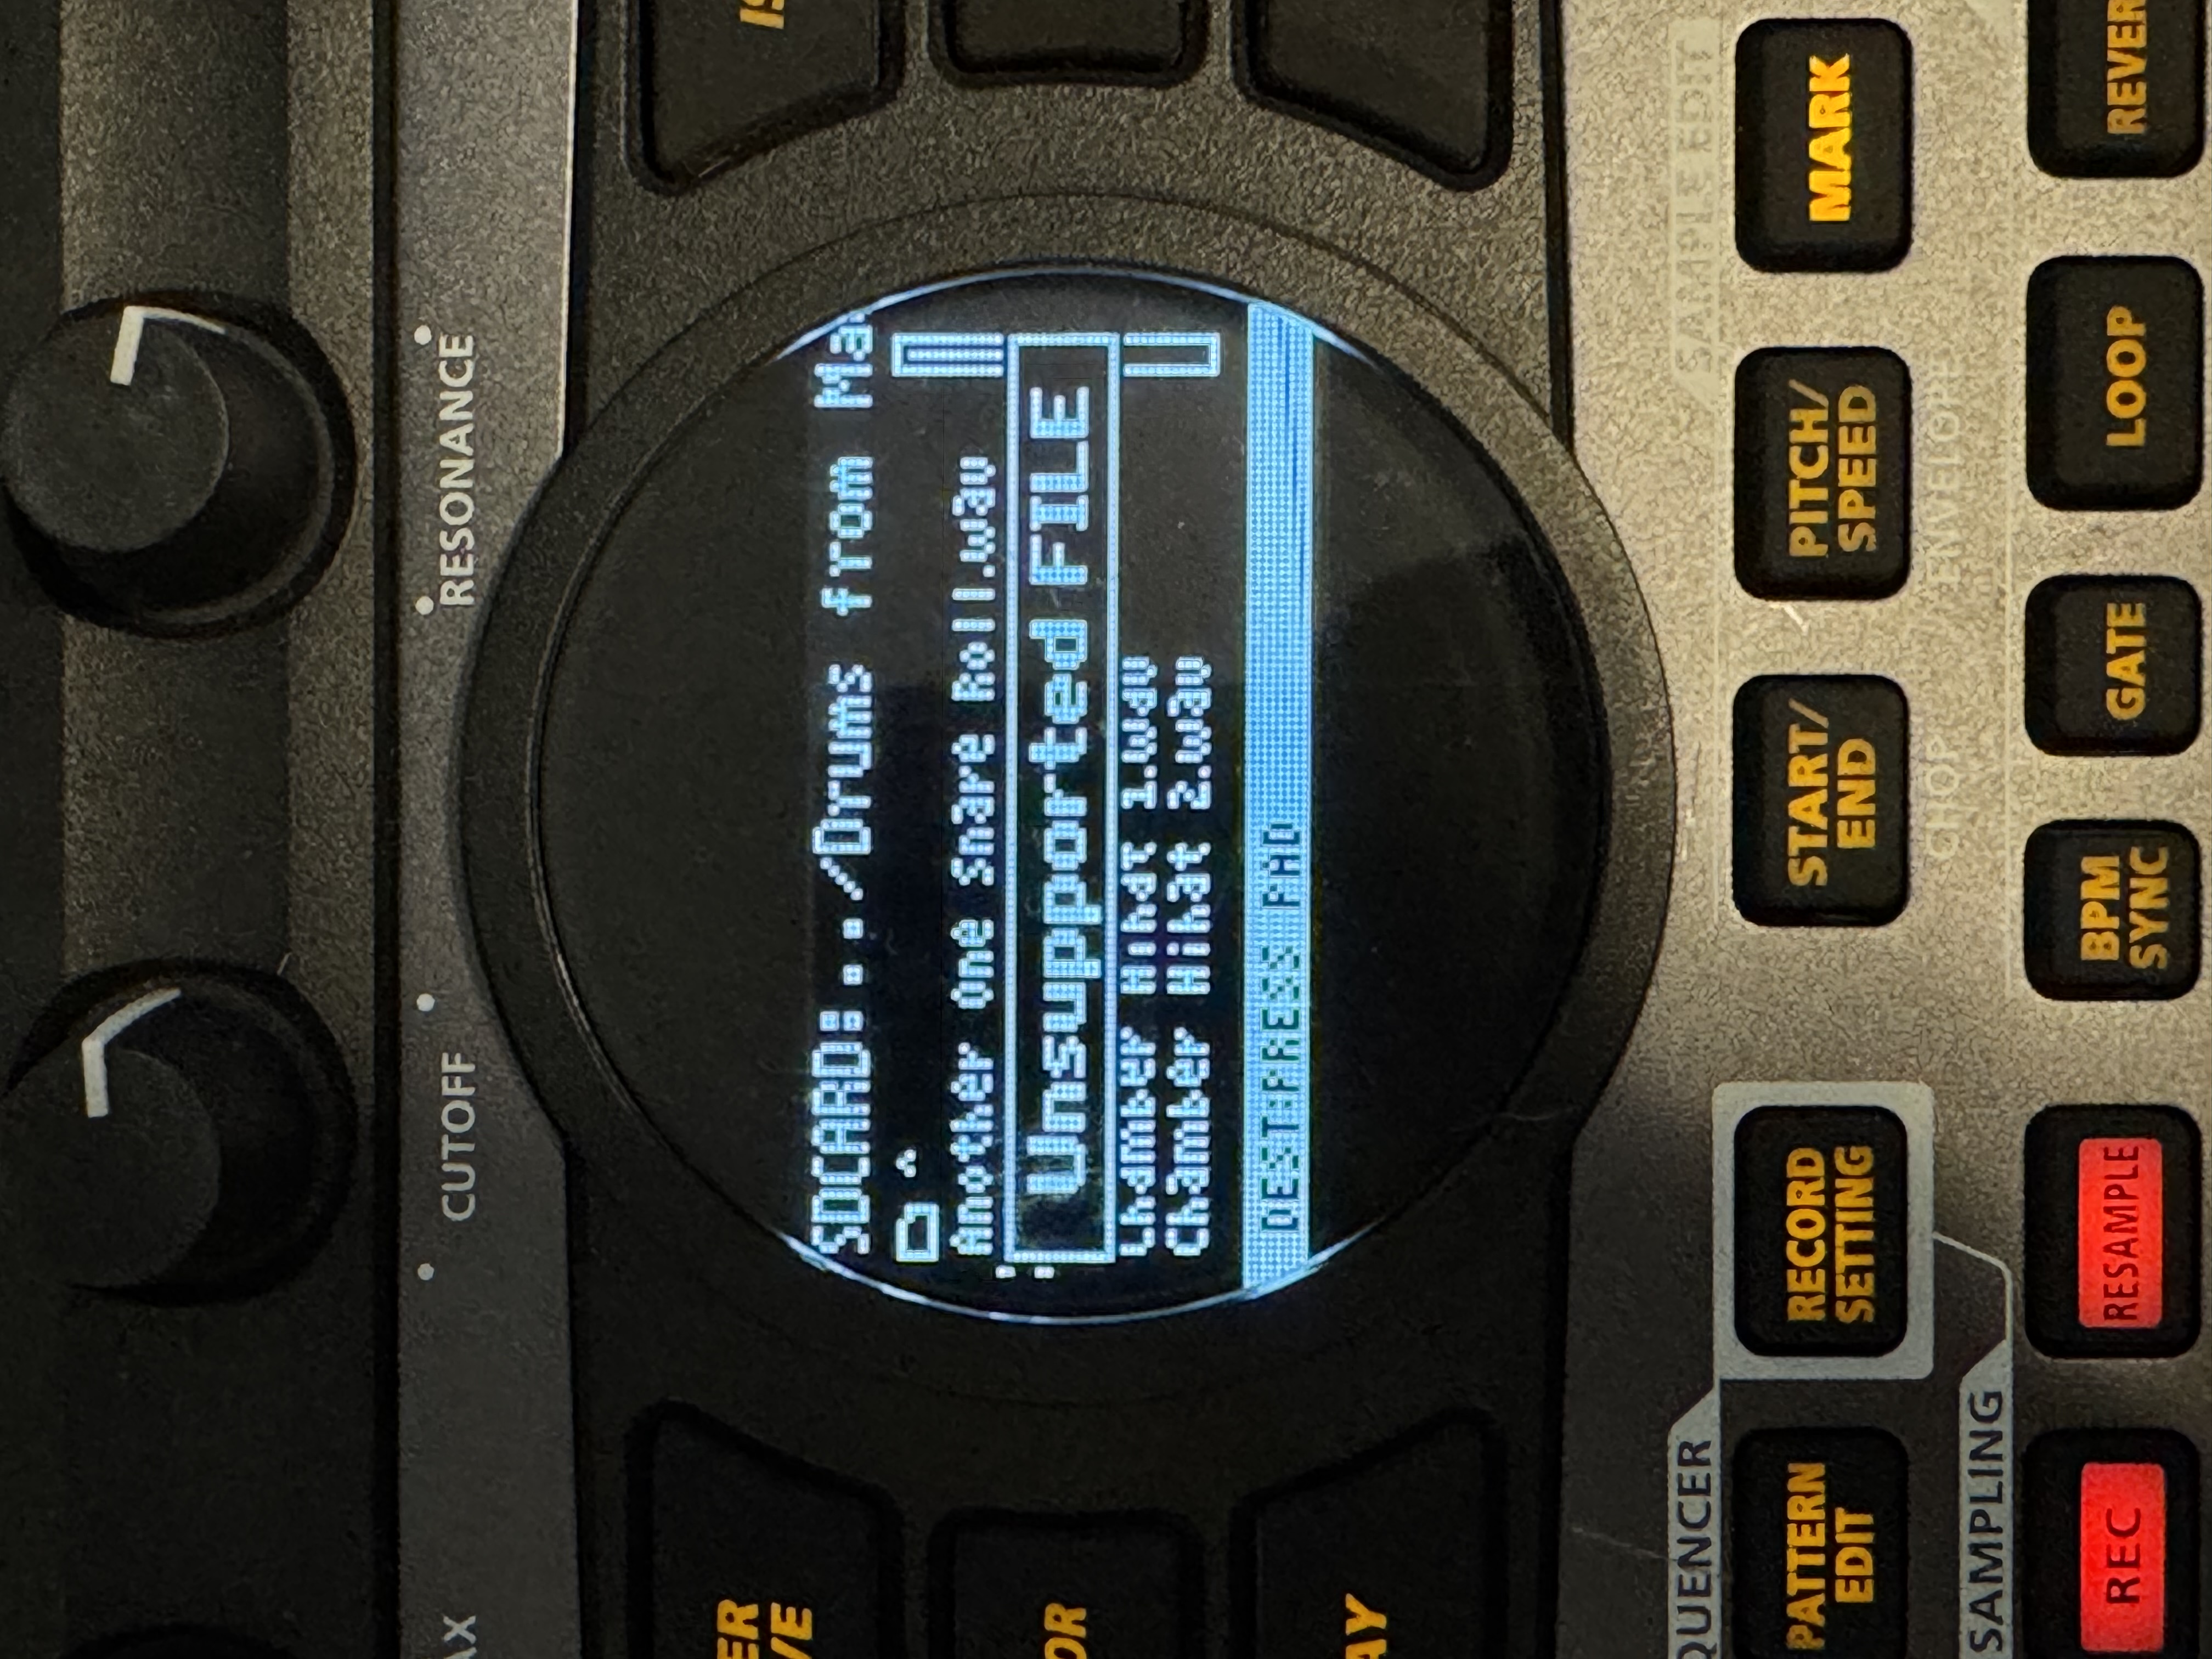
If you’ve ever tried to load samples from Splice or Reddit’s r/drumkits onto your Roland SP404 MK2, you’ve probably run into the frustrating “Unsupported File” problem. You get everything organized, load your SD card, boot up the sampler and… half your carefully curated collection won’t play.
Annoying. After spending hours organizing my sample library only to find that a bunch of files were incompatible with my SP404, I decided to create a simple tool to solve this problem once and for all.
The SP404 MK2’s Picky Audio Requirements
Roland documents different requirements depending on how you import your samples:
- From an SD card: 16-bit linear WAV or AIFF files (MP3 is also supported)
- Through the SP-404MKII app: WAV, AIFF, MP3, FLAC, and M4A, including 24-bit support for applicable lossless formats
Roland lists these supported sample rates:
- 16 kHz
- 22.05 kHz
- 32 kHz
- 44.1 kHz
- 48 kHz
- 88.2 kHz
- 96 kHz
- 176.4 kHz
- 192 kHz
You can find the details in Roland’s current import-format documentation and SP-404MKII app guide. The sampler converts imported audio to 48 kHz/16-bit internally.
The problem is that samples from popular sources often don’t meet these requirements. For example:
- Samples from Reddit’s r/drumkits often come in various formats, many incompatible
- Some sample packs use 32-bit integer or floating-point files for extra precision and headroom during production. That does not automatically make them sound better than a well-prepared 16- or 24-bit sample.
Unfortunately, the SP404 simply won’t recognize files that don’t match its specifications. It will show “Unsupported File” when you try to load them, but it won’t tell you what the problem is.
A Simple Solution
After dealing with this issue repeatedly, I built a small shell script that automatically:
- Scans your sample folders
- Identifies WAV files that won’t work on the SP404 MK2
- Converts incompatible files to a conservative SD-card-friendly format (16-bit, 44.1 kHz)
- For already compatible files, it simply copies them to the destination
- Preserves your entire folder structure in a “converted” directory
- Leaves your original files completely untouched
The script skips a source path when its matching output file already exists, so you can run it multiple times without duplicating work. Once the script is done running, you’ll have a “converted” folder containing all your samples in SP404-compatible formats.
How the Script Works
The script is pretty straightforward. Here’s a breakdown of what’s happening behind the scenes:
1
2
3
4
5
# When no path is supplied, it uses macOS's native folder picker
folder=$(osascript -e 'tell application "Finder"
    set folderPath to POSIX path of (choose folder with prompt "Select folder containing WAV files:")
    return folderPath
end tell')
This gives you a familiar folder selection dialog that integrates seamlessly with macOS.
Then it defines a function to check if files are compatible:
1
2
3
4
5
6
7
8
9
10
11
12
13
14
15
16
17
18
19
20
21
22
23
24
25
26
27
28
29
30
31
32
33
34
35
36
37
is_compatible() {
    local file="$1"

    local probe_output
    local key value
    local codec_name=""
    local sample_rate=""
    local bits_per_sample=""

    if ! probe_output=$(ffprobe -v error -select_streams a:0 \
        -show_entries stream=codec_name,sample_rate,bits_per_sample \
        -of default=noprint_wrappers=1 "$file" 2>/dev/null); then
        return 1
    fi

    while IFS='=' read -r key value; do
        case "$key" in
            codec_name) codec_name=$value ;;
            sample_rate) sample_rate=$value ;;
            bits_per_sample) bits_per_sample=$value ;;
        esac
    done <<< "$probe_output"

    # SD-card WAV imports require 16-bit linear PCM.
    if [ "$codec_name" != "pcm_s16le" ] || [ "$bits_per_sample" != "16" ]; then
        return 1
    fi

    case "$sample_rate" in
        16000|22050|32000|44100|48000|88200|96000|176400|192000)
            return 0
            ;;
        *)
            return 1
            ;;
    esac
}
FFprobe’s sample_fmt is not a bit-depth field: 24-bit PCM is commonly reported with the s32 sample format because it is stored in a 32-bit container. The script instead reads named fields and checks the PCM codec and reported bits per sample directly.
As the script processes each file:
- It checks if the file has already been processed in a previous run
- If not, it checks if the file is already compatible with the SP404 MK2
- For incompatible files, it converts them to 16-bit, 44.1 kHz PCM WAV format
- For compatible files, it simply copies them to maintain the same organization
- It creates matching directories in the “converted” folder to preserve your folder structure
- It keeps track of how many files were converted, copied, previously processed, or failed
The files are converted by this FFmpeg command:
1
2
ffmpeg -v error -nostdin -y -i "$file" -map 0:a:0 \
    -c:a pcm_s16le -ar 44100 -f wav "$temporary_file"
In English:
-i "$file"specifies the input file to convert-c:a pcm_s16lesets the audio codec to 16-bit linear PCM, which works with SD-card import-ar 44100sets the sample rate to a conservative, supported 44.1 kHz-map 0:a:0selects the first audio stream explicitly-f wav "$temporary_file"writes a WAV to a temporary path
The command is wrapped in a conditional statement that increments the conversion counter only if conversion succeeds. The script then renames the temporary file into place, so a partial file cannot be mistaken for completed work on the next run. If conversion fails, it removes the temporary file, reports the failure, and continues processing other files.
Why I Built This
I could have manually converted files one by one using Logic Pro or another audio editor. But that’s tedious, especially when you have hundreds or thousands of samples. And honestly, I wanted to spend my time making music, not converting file formats.
There are existing libraries like r8brain-free-src that offer high-quality sample rate conversion, but they involve complex C++ code that I frankly don’t understand well enough to modify for my specific needs. I wanted something straightforward that I could easily customize for my own workflow without diving into advanced DSP algorithms.
I’ve used FFmpeg before and knew it could handle the conversion without pulling in a bunch of DSP code I didn’t need. For those who aren’t familiar, FFmpeg is an open-source multimedia framework that can handle pretty much any audio or video format you throw at it. It’s the behind-the-scenes engine powering countless media applications and websites.
A few reasons why I like FFmpeg for a project like this:
- Versatility: It can read tons of audio formats and convert between them
- Efficiency: It’s really fast, even when processing large batches of files
- Command-line interface: Makes it easy to script and automate processes
- Active development: The project continues to receive improvements and new features
- Cross-platform libraries: FFmpeg’s libraries and third-party language bindings make it adaptable to different environments
For this script, I’m only using a tiny fraction of FFmpeg’s capabilities.
Given FFmpeg’s extensive language support, I could eventually rewrite this shell script as an Electron desktop app or even a web service that handles the conversions directly in the browser… 🤔 Maybe a project for another day when I’m not busy sampling on my SP404.
Fun fact: Even YouTube used FFmpeg in their video processing pipeline in the past. According to research from multimedia.cx, they discovered YouTube was using FFmpeg by uploading obscure video formats with specific rendering issues that only appeared in certain FFmpeg versions. While YouTube likely uses custom solutions nowadays, it shows how reliable and ubiquitous FFmpeg has become for serious media processing.
Anyways back to the whole why I built this thing, I also like keeping my original samples intact (some DAWs prefer 32-bit float files), so having an automated way to create a “SP404-ready” version of my sample library while preserving the originals felt like the right approach.
One thing that makes this script particularly useful is that all converted files are placed in the “converted” folder, regardless of whether they were already compatible or needed conversion. This gives you one neat, organized place where you know every single file will work with the SP404 MK2. No more guessing which samples might cause problems - just copy everything from the “converted” folder to your SD card and you’re ready to go.
Using the Tool
If you’re a fellow SP404 MK2 user struggling with sample compatibility, you can grab the script from my GitHub repository. All you need is:
- Bash (macOS is required only for the optional folder picker)
- FFmpeg installed (
brew install ffmpegif you have Homebrew)
Just download the script, make it executable (chmod +x convert-wavs.sh), and run it. Select your sample folder when prompted, and it’ll handle the rest. You can also pass a directory directly: ./convert-wavs.sh "/path/to/samples".
The script will create a “converted” folder containing every successfully processed WAV: compatible files are copied as-is and incompatible files are converted, all with the same folder structure as your originals. Copy that complete collection to your SD card, and you’re good to go.
Final Thoughts
The SP404 MK2 is a fantastic instrument that has become central to my production workflow. This little script has saved me countless hours of frustration and let me focus on what matters, namely making music.
If you’re using the SP404 MK2, I hope this tool helps you as much as it’s helped me. And if you have any suggestions for improvements, feel free to contribute to the repository. I’m always open to making it better.
Happy sampling!